I’ve recently migrated Dona Rita’s website from Jekyll to Gatsby. I’d like to share my process with you, as well as a few tips about building a JAMstack site with Gatsby, Netlify and Netlify CMS.
A bit of background
What is JAMstack?
JAM stands for Javascript API & Markup. The term JAMstack was popularised by Mathias Biilmann (CEO & Co-founder of Netlify) to describe “a modern web development architecture based on client-side JavaScript, reusable APIs, and prebuilt Markup”. You can read more about JAMstack here.
What is Gatsby?
Gatsby is a blazing-fast Static Site Generator for React — this is important because I wanted to keep the JAMStack I had with Jekyll. Apart from being a SSG, Gatsby is build with modern technologies, it’s future-proof, it’s a static PWA out-of-the-box and you can query your data from anywhere via GraphQL 😍
What/Who is Dona Rita?
Dona Rita is my side business. When I’m not busy coding, I’m selling gluten-free Brazilian cheese balls to the British population 😅
My process
The original Dona Rita website was built with Jekyll and hosted on Github Pages. It was built in an MVP approach, you can read more about that here. Overall, it was working well, but let’s be honest… Liquid partials are not React components.
When I decided to change my setup from Jekyll to Gatsby, I wasn’t quite sure how much work/effort that’d be. I wanted to keep things as simple as possible. In the end I think I was able to find a nice process.
Here’s how I did it:
Documentation
I started by reading Gatsby’s documentation. They also wrote a neat tutorial. Gatsby works differently than Jekyll, so it’s worth giving these a read first.
Choosing a Gatsby starter
I used the gatsby-starter-hello-world. This is probably the simplest starter you can use. I chose this because I wanted to start with bare minimum configuration. I find it easier to learn a framework this way.
Creating a Gatsby Layout
Anything you add to a Layout Component will be shared amongst all other pages. This is particularly useful for global components, such as Navigation or Footer.
You can see the source code for my layout here.
Stateless pages
I started by creating stateless Page Components. The point here was to start getting a feel for how Gatsby creates pages, without having to worry about GraphQL.
I left stateful pages (pages that depend on data) and dynamic pages (pages that will be generated from Markdown files) for later.
The first page I added was the Ingredients page, you can see the source code here.
Adding styles
The original Dona Rita website was styled with global CSS, written in Sass. To keep things moving, I decided to keep this approach instead of converting my styles to Styled Components.
In order for Gatsby to process Sass files, you need install gatsby-plugin-sass (drop-in support, works like a charm).
Because I needed to inject the styles globally, I imported them in my Layout file.
Stateful pages
By now I had a few static pages rendered and styled correctly. I was becoming more comfortable with Gatsby and I was ready to create my first stateful page.
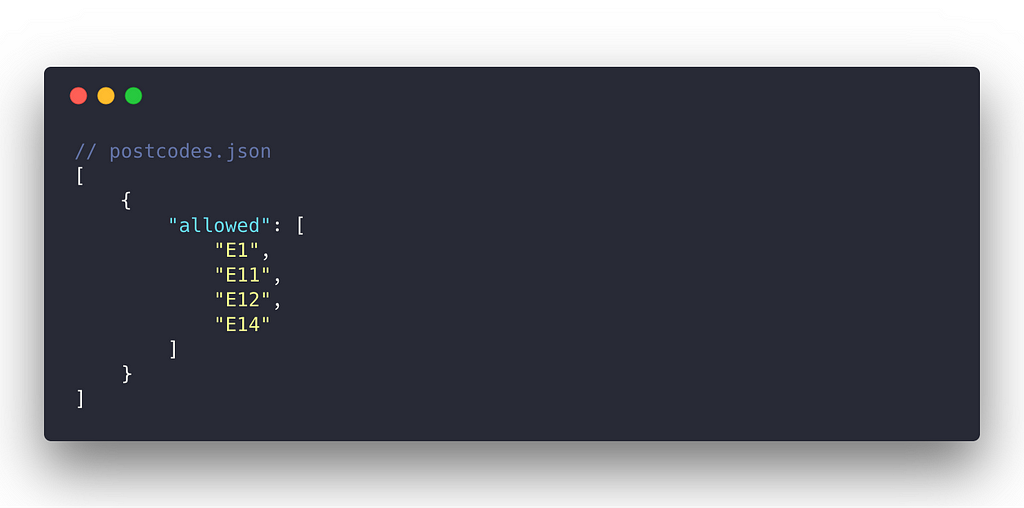
I decided to start with the Buy Page. For this page I needed to get access to a list of allowed postcodes which I will be passed down to my Product Component to determine whether we can deliver there or not.
I created a file called postcodes.json in a src/data/ directory and installed the following dependencies: gatsby-source-filesystem and gatsby-transformer-json.
Here’s source code for the JSON file and here’s the source code for the Buy page.
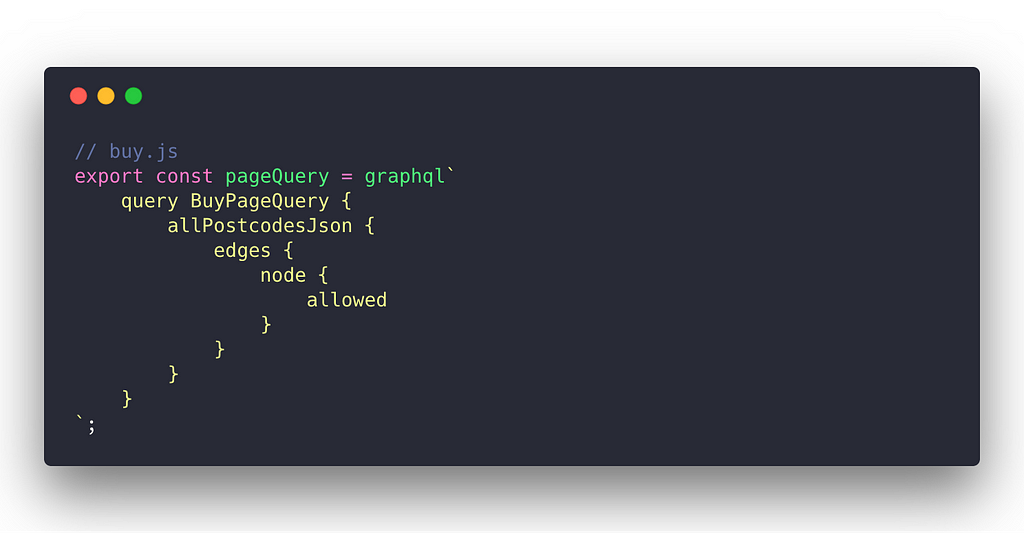
#protip: Gatsby has a really nice tutorial to help understand its data layer. Definitely worth a read.
Components abstraction
Once most of my stateless and stateful pages were created, I took a bit of time to refactor some parts of the code. I created a src/components/ folder and added a few components to help improve maintainability of the project.
Here’s a list of the components I abstracted.
Moving from GH Pages to Netlify
I was happy with Github Pages, but Netlify is so good, so fast, so easy to use that it’s hard to say no… it offers instant rollbacks, one-click SSL, prerendering, deploy previews, and many more awesome features.
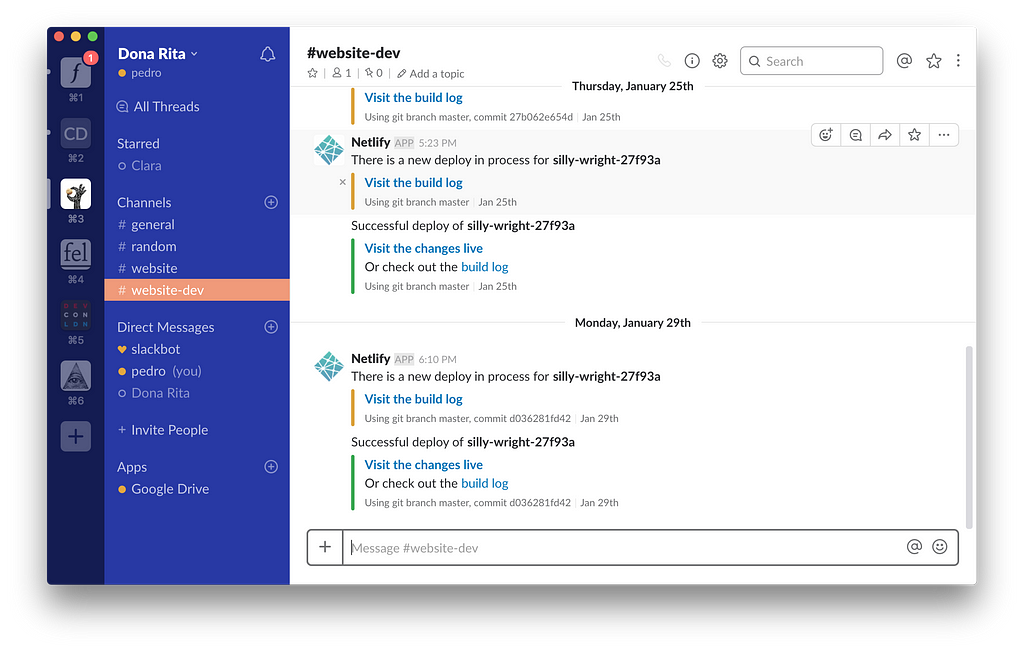
When a new Pull Request is created, Netlify automatically generates a Deploy Preview. This feature is pure gold. It allows you and other members of the team to see how the changes affect the project.
When the PR gets merged to the master branch, then Netlify triggers the production deployment. I’ve turned on Slack Notification, so everyone in the team knows when a new production deployment has happened 🎉
Adding Netlify CMS
Netlify CMS is an open source content management system for Git workflows. I decided to give it a try as it seemed surprisingly simple.
The way I set it up was by authenticating Netlify CMS with Github via Netlify Identity. As with anything Netlify related, it was only a couple of clicks.
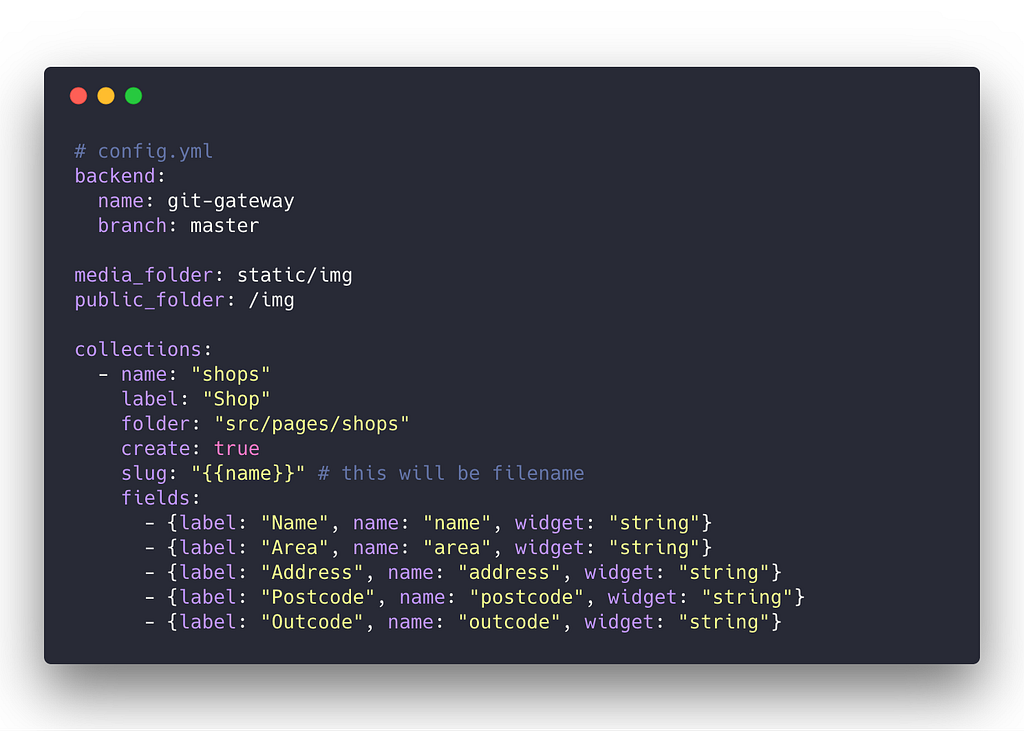
I used Netlify CMS to manage my “Shops” data. The way I am managing this data is by having one Markdown file per Shop. You can see the source for the Shops page here.
I also created a configuration file. Through this file I was able to create collections and to define which fields can be modified via the CMS.
You can see the source for Netlify config here.
If you’re interested in adding a CMS to your static site, I’d definitely recommend using Netlify CMS. You can read the docs here.
Wrapping up
I’m really happy with these changes. Gatsby, Netlify and Netlify CMS are all game changers. And when used together, they work in complete harmony.
If you’re as interested in JAMstack as I do, I’d highly recommend using these tools.
If you have any advice on how anything here can be improved, please feel free to let me know 🙌
The initial Jekyll-to-Gatsby migration took me about 6 hours (including having to learn Gatsby and GraphQL).
Source Code
The code for Dona Rita’s website is public on Github. Feel free to browse around!
More helpful resources and links
- Moving to Gatsby by Jules Forrest
- Migrate from Jekyll to Gatsby by Nahuel Scotti
- JAMstack website
- Smashing Magazine just got 10x faster
- Image Optimization Made Easy with Gatsby.js by Kyle Gill
- Page loading bar with gatsy-plugin-nprogress
- Support for SASS/SCSS with gatsby-plugin-sass
- Default Netlify CMS implementation with gatsby-plugin-netlify-cms
- React Google Analytics module with react-ga
- Code images by Carbon
Thanks for reading. Find me on Twitter 🐤
👋
📣 Update
Since writing this Gatsby v2 has been released, including some awesome improvements 🎉
Please refer to the official migration guide here.
JAMstack with Gatsby, Netlify and Netlify CMS was originally published in Netlify on Medium, where people are continuing the conversation by highlighting and responding to this story.